
3DsMAX does not come with the ability to do a fisheye lens effect (well - it does if you follow this tutorial). There´s a long range of expensive plugins and 3rd party renderers that will do this - probably more accurate than this tut too, but at least this one costs nothing ;)
I don´t know if someone else have thought of this, and I am in fact merely "re-inventing the wheel", but I think its a good tip still.
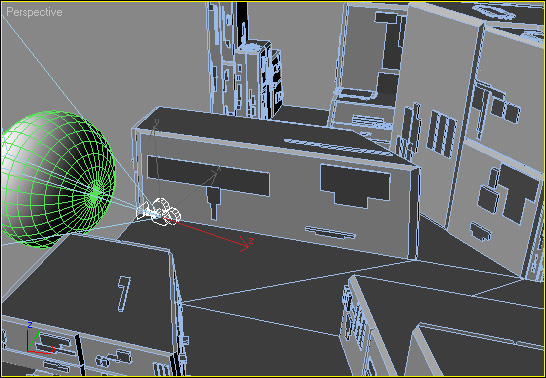
Setup - Top view
 Ok - it´s really not that tricky. As you can see from the Topview picture, all I´ve done is place a sphere in front of the camera.
 "But the camera is with its back to the scene".
Indeed - and thats because you´re filming the reflection of the scene, in the sphere.
The sphere has been given a Chrome-material, with NO highlights (important!). And i have aligned it to the camera, both with position and orientation - then I´ve moved along the sphere´s local Z-axxis to a little bit in front of the camera, and scaled it along its local Z-axxis.
The scaling allows you to determine the amount of the fisheye effect.... The more round or pointy, the stronger the effect - and the flatter (like an M&M) the less the effect.
Setup - Perspective view
 You can link the sphere to the camera, or the other way around, once you have them positioned and aligned properly together. You need to make sure that the sphere covers the entire frame (corner to corner) - or you´ll get weird results.
For animating purposes, you need to steer clear of obstacles - remember, this is a reflection and objects can conflict with the chromesphere. If you find that the sphere is too big to pass a corridor or other obstacle, you can scale down the sphere (uniformly) and move it closer to the camera.
Thats it really. But there´s some things to take into consideration as well :
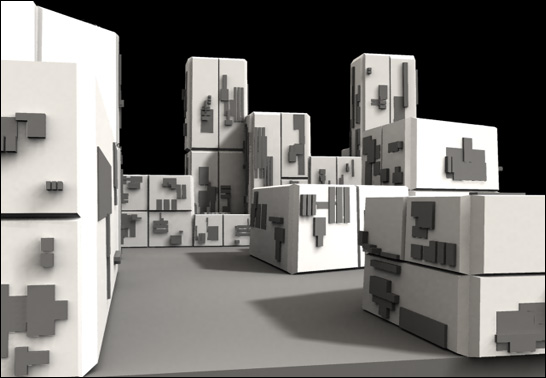
Std. MAX render
 1. You are capturing a reflection - so everything will be mirrored. Flip the rendered images/movies in whatever image/video-editing software you normally use.
2. Since you´re shooting a reflection, stuff like GI and other advanced lighting solutions, will need more samples to avoid graininess - also higher Raytracing quality might help.
3. You will kinda be animating backwards - and it takes a little getting used to.
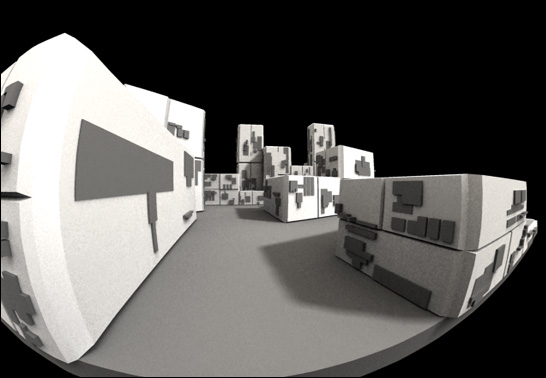
Fisheye rendering
 4. You can´t get a proper viewport preview, since this method relies on materials. If in doubt, do some testrenderings.
5. To avoid the ChromeSphere reflecting in other reflective surfaces of the scene (like a window or similar), use the Local Exclude option in the Raytrace options of the material. Exclude from both illumination and shadow casting. Also, depending on your render engine, you might have to exclude the ChromeSphere from GI solutions and/or Skylights.
6. I have not tested this method on that many scenes - so I cannot guarantee it will work with YOUR setup. But give it a go - and I´d love to get some feedback, and see your results, if you use this tutorial.
Enjoy!
Oh, and be sure to get the Mirror Image render effect plugin from Boomerlabs - to easily flip your images from within MAX.
 Copyright 2004 - Nick Jensen