


Let's get on with it...
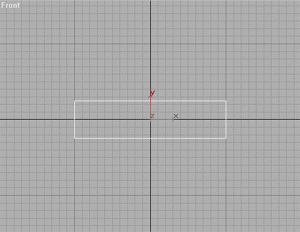
Phase 1 :
Go to
X=0, Y=0, Z=0
Width = 200
Height = 50
---------------
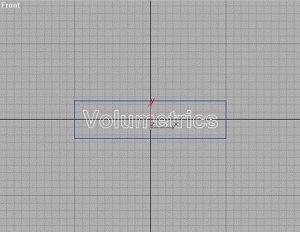
Phase 2 :
Once again go to create - shapes, and create the Text you want in the FRONT viewport. Place it in the middle of the Rectangle - this might take a little tweaking of the size of the Text-shape.
----------------
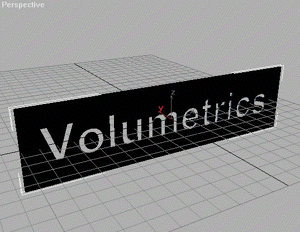
Phase 3 :
Go to
Next up, attach the Text Shape to the rectangle by clicking
Then add a Bevel modifier (if you cant find it in the modifier list, click more)
Try these settings for starters (you can always alter them) :
Start Outline = 0,0
Level 1 :
Height = 1,0
Outline = 0,5
Check Level 2 :
Height = 1,0
Outline = 0,0
Check Level 3 :
Height = 1,0
Outline = -0,5
----------------
Phase 4 :
Go to
Place the spot about 200 units behind the Logo, and the Target about 80-100 in front of the Logo. Correct placement is important!
Now its time to fit the Spotlight Cone.
Select the Spot and go to
Hotspot/Falloff make the Spotlight Cone fit like here (the lightblue is the Hotspot cone, and the darkblue the Falloff cone - and the Falloff cone should be approx 3,0 units bigger than the Spotlight Cone. It takes a little tweaking, I know, but you´ll get it right)
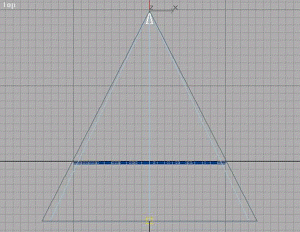
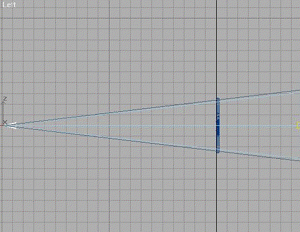
Done? Ok...
Now to setup the rest of the Spotlight Parameters.
Color = whatever color you like.
Multiplier = 2,0
And make sure to check the Cast shadows in the Shadow Parameter Rollout.
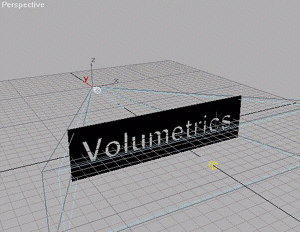
Time to set the perspective - move your PERSPECTIVE view around untill it looks a bit like the image above.
Try to get the Center of the Spotlight visible through a middle letter. You will know why when you see the rendering. Do NOT rotate the objects - use Arc Rotate, and Pan to set the perspective.
----------------
Phase 5 :
Now go to the Render menu, click Environment, and in the Atmosphere section, click Add, and select Volume Light from the list.
Click Pick Light, and select the Target Spot.
Settings for Volume Light (for now try these settings) :
Volume :
Density = 2
Check Use Attenuation Color
Check Filter Shadows : High
Sample Volume = 100% (if above options arent available, then de-check Auto)
Attenuation :
Start % = 100
End % = 80
Noise :
Check Noise On
Amount = 0,5
Check Turbulence
Size = 15
Check Wind From The : Back
- just leave the rest to its default settings.
----------------
Phase 6 :
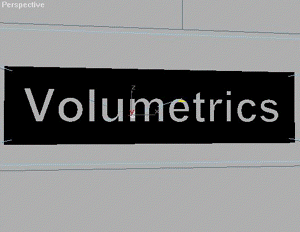
Activate Perspective View, and hit
Looks pretty nifty, yeah?